Enhance image search experiences with Amazon Personalize, Amazon OpenSearch Service, and Amazon Titan Multimodal Embeddings in Amazon Bedrock
A variety of different techniques have been used for returning images relevant to search queries. Historically, the idea of creating a joint embedding space to facilitate image captioning or text-to-image search has been of interest to machine learning (ML) practitioners and businesses for quite a while. Contrastive Language–Image Pre-training (CLIP) and Bootstrapping Language-Image Pre-training (BLIP) were the first two open source models that achieved near-human results on the task. More recently, however, there has been a trend to use the same techniques used to train powerful generative models to create multimodal models that map text and images to the same embedding space to achieve state-of-the-art results.
In this post, we show how to use Amazon Personalize in combination with Amazon OpenSearch Service and Amazon Titan Multimodal Embeddings from Amazon Bedrock to enhance a user’s image search experience by using learned user preferences to further personalize image searches in accordance with a user’s individual style.
Solution overview
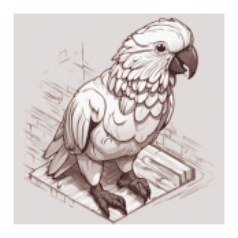
Multimodal models are being used in text-to-image searches across a variety of industries. However, one area where these models fall short is in incorporating individual user preferences into their responses. A user searching for images of a bird, for example, could have many different desired results.
 |
 |
 |
 |
 |
 |
In an ideal world, we can learn a user’s preferences from their previous interactions with images they either viewed, favorited, or downloaded, and use that to return contextually relevant images in line with their recent interactions and style preferences.
Implementing the proposed solution includes the following high-level steps:
- Create embeddings for your images.
- Store embeddings in a data store.
- Create a cluster for the embeddings.
- Update the image interactions dataset with the image cluster.
- Create an Amazon Personalize personalized ranking solution.
- Serve user search requests.
Prerequisites
To implement the proposed solution, you should have the following:
- An AWS account and familiarity with Amazon Personalize, Amazon SageMaker, OpenSearch Service, and Amazon Bedrock.
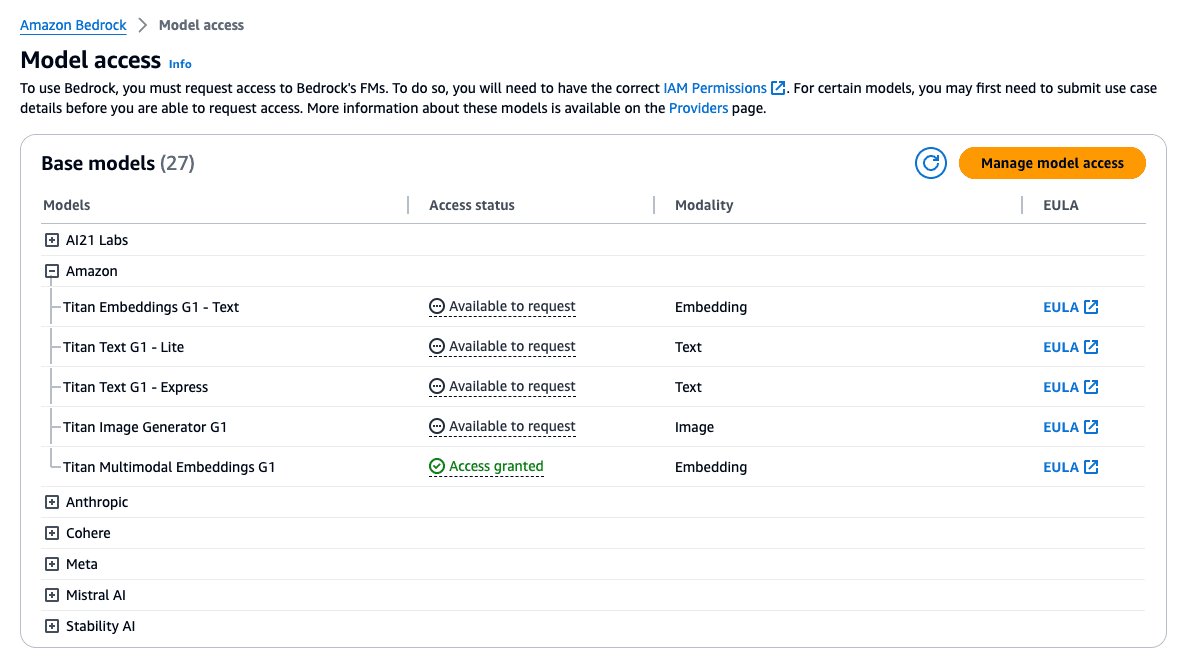
- The Amazon Titan Multimodal Embeddings model enabled in Amazon Bedrock. You can confirm it’s enabled on the Model access page of the Amazon Bedrock console. If Amazon Titan Multimodal Embeddings is enabled, the access status will show as Access granted, as shown in the following screenshot. You can enable access to the model by choosing Manage model access, selecting Amazon Titan Multimodal Embeddings G1, and then choosing Save Changes.
- A SageMaker domain. You can onboard a SageMaker domain by using the Set up for single users procedure from the SageMaker console.
- Either an OpenSearch Service collection or a domain. For Amazon OpenSearch Serverless, you can create a collection. For OpenSearch Service, you can create a domain.
Create embeddings for your images
Embeddings are a mathematical representation of a piece of information such as a text or an image. Specifically, they are a vector or ordered list of numbers. This representation helps capture the meaning of the image or text in such a way that you can use it to determine how similar images or text are to each other by taking their distance from each other in the embedding space.
 |
→ [-0.020802604, -0.009943095, 0.0012887075, -0…. |
As a first step, you can use the Amazon Titan Multimodal Embeddings model to generate embeddings for your images. With the Amazon Titan Multimodal Embeddings model, we can use an actual bird image or text like “bird” as an input to generate an embedding. Furthermore, these embeddings will be close to each other when the distance is measured by an appropriate distance metric in a vector database.
The following code snippet shows how to generate embeddings for an image or a piece of text using Amazon Titan Multimodal Embeddings:
It’s expected that the image is base64 encoded in order to create an embedding. For more information, see Amazon Titan Multimodal Embeddings G1. You can create this encoded version of your image for many image file types as follows:
In this case, input_image can be directly fed to the embedding function you generated.
Create a cluster for the embeddings
As a result of the previous step, a vector representation for each image has been created by the Amazon Titan Multimodal Embeddings model. Because the goal is to create more personalize image search influenced by the user’s previous interactions, you create a cluster out of the image embeddings to group similar images together. This is useful because will force the downstream re-ranker, in this case an Amazon Personalize personalized ranking model, to learn user presences for specific image styles as opposed to their preference for individual images.
In this post, to create our image clusters, we use an algorithm made available through the fully managed ML service SageMaker, specifically the K-Means clustering algorithm. You can use any clustering algorithm that you are familiar with. K-Means clustering is a widely used method for clustering where the aim is to partition a set of objects into K clusters in such a way that the sum of the squared distances between the objects and their assigned cluster mean is minimized. The appropriate value of K depends on the data structure and the problem being solved. Make sure to choose the right value of K, because a small value can result in under-clustered data, and a large value can cause over-clustering.
The following code snippet is an example of how to create and train a K-Means cluster for image embeddings. In this example, the choice of 100 clusters is arbitrary—you should experiment to find a number that is best for your use case. The instance type represents the Amazon Elastic Compute Cloud (Amazon EC2) compute instance that runs the SageMaker K-Means training job. For detailed information on which instance types fit your use case, and their performance capabilities, see Amazon Elastic Compute Cloud instance types. For information about pricing for these instance types, see Amazon EC2 Pricing. For information about available SageMaker notebook instance types, see CreateNotebookInstance.
For most experimentation, you should use an ml.t3.medium instance. This is the default instance type for CPU-based SageMaker images, and is available as part of the AWS Free Tier.
Store embeddings and their clusters in a data store
As a result of the previous step, a vector representation for each image has been created and assigned to an image cluster by our clustering model. Now, you need to store this vector such that the other vectors that are nearest to it can be returned in a timely manner. This allows you to input a text such as “bird” and retrieve images that prominently feature birds.
Vector databases provide the ability to store and retrieve vectors as high-dimensional points. They add additional capabilities for efficient and fast lookup of nearest neighbors in the N-dimensional space. They are typically powered by nearest neighbor indexes and built with algorithms like the Hierarchical Navigable Small World (HNSW) and Inverted File Index (IVF) algorithms. Vector databases provide additional capabilities like data management, fault tolerance, authentication and access control, and a query engine.
AWS offers many services for your vector database requirements. OpenSearch Service is one example; it makes it straightforward for you to perform interactive log analytics, real-time application monitoring, website search, and more. For information about using OpenSearch Service as a vector database, see k-Nearest Neighbor (k-NN) search in OpenSearch Service.
For this post, we use OpenSearch Service as a vector database to store the embeddings. To do this, you need to create an OpenSearch Service cluster or use OpenSearch Serverless. Regardless which approach you used for the cluster, you need to create a vector index. Indexing is the method by which search engines organize data for fast retrieval. To use a k-NN vector index for OpenSearch Service, you need to add the index.knn setting and add one or more fields of the knn_vector data type. This lets you search for points in a vector space and find the nearest neighbors for those points by Euclidean distance or cosine similarity, either of which is acceptable for Amazon Titan Multimodal Embeddings.
The following code snippet shows how to create an OpenSearch Service index with k-NN enabled to serve as a vector datastore for your embeddings:
The following code snippet shows how to store an image embedding into the open search service index you just created:
Update the image interactions dataset with the image cluster
When creating an Amazon Personalize re-ranker, the item interactions dataset represents the user interaction history with your items. Here, the images represent the items and the interactions could consist of a variety of events, such as a user downloading an image, favoriting it, or even viewing a higher resolution version of it. For our use case, we train our recommender on the image clusters instead of the individual images. This gives the model the opportunity to recommend based on the cluster-level interactions and understand the user’s overall stylistic preferences as opposed to preferences for an individual image in the moment.
To do so, update the interaction dataset including the image cluster instead of the image ID in the dataset, and store the file in an Amazon Simple Storage Service (Amazon S3) bucket, at which point it can be brought into Amazon Personalize.
Create an Amazon Personalize personalized ranking campaign
The Personalized-Ranking recipe generates personalized rankings of items. A personalized ranking is a list of recommended items that are re-ranked for a specific user. This is useful if you have a collection of ordered items, such as search results, promotions, or curated lists, and you want to provide a personalized re-ranking for each of your users. Refer to the following example available on GitHub for complete step-by-step instructions on how to create an Amazon Personalize recipe. The high-level steps are as follows:
- Create a dataset group.
- Prepare and import data.
- Create recommenders or custom resources.
- Get recommendations.
We create and deploy a personalized ranking campaign. First, you need to create a personalized ranking solution. A solution is a combination of a dataset group and a recipe, which is basically a set of instructions for Amazon Personalize to prepare a model to solve a specific type of business use case. Then you train a solution version and deploy it as a campaign.
The following code snippet shows how to create a Personalized-Ranking solution resource:
The following code snippet shows how to create a Personalized-Ranking solution version resource:
The following code snippet shows how to create a Personalized-Ranking campaign resource:
Serve user search requests
Now our solution flow is ready to serve a user search request and provide personalized ranked results based on the user’s previous interactions. The search query will be processed as shown in the following diagram.
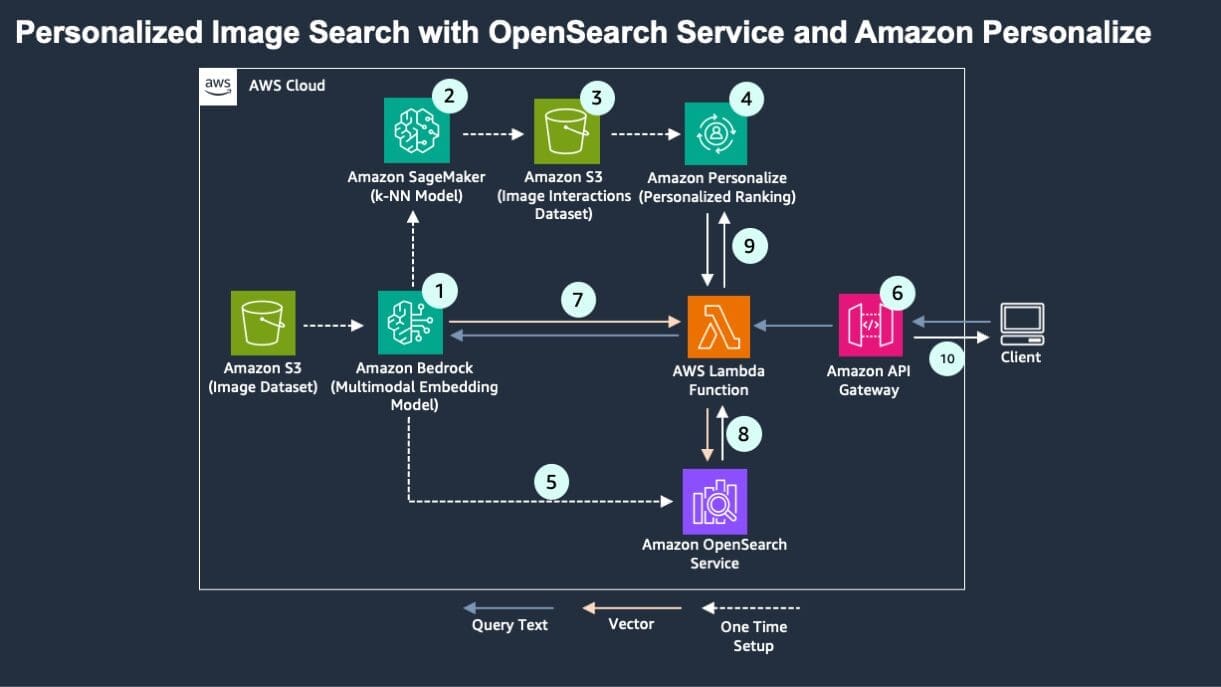
To setup personalized multimodal search, one would execute the following steps:
- Multimodal embeddings are created for the image dataset.
- A clustering model is created in SageMaker, and each image is assigned to a cluster.
- The unique image IDs are replaced with cluster IDs in the image interactions dataset.
- An Amazon Personalize personalized ranking model is trained on the cluster interaction dataset.
- Separately, the image embeddings are added to an OpenSearch Service vector index.
The following workflow would be executed to process a user’s query:
- Amazon API Gateway calls an AWS Lambda function when the user enters a query.
- The Lambda function calls the same multimodal embedding function to generate an embedding of the query.
- A k-NN search is performed for the query embedding on the vector index.
- A personalized score for the cluster ID for each retrieved image is obtained from the Amazon Personalize personalized ranking model.
- The scores from OpenSearch Service and Amazon Personalize are combined through a weighted mean. The images are re-ranked and returned to the user.
The weights on each score could be tuned based on the available data and desired outcomes and desired degrees of personalization vs. contextual relevance.
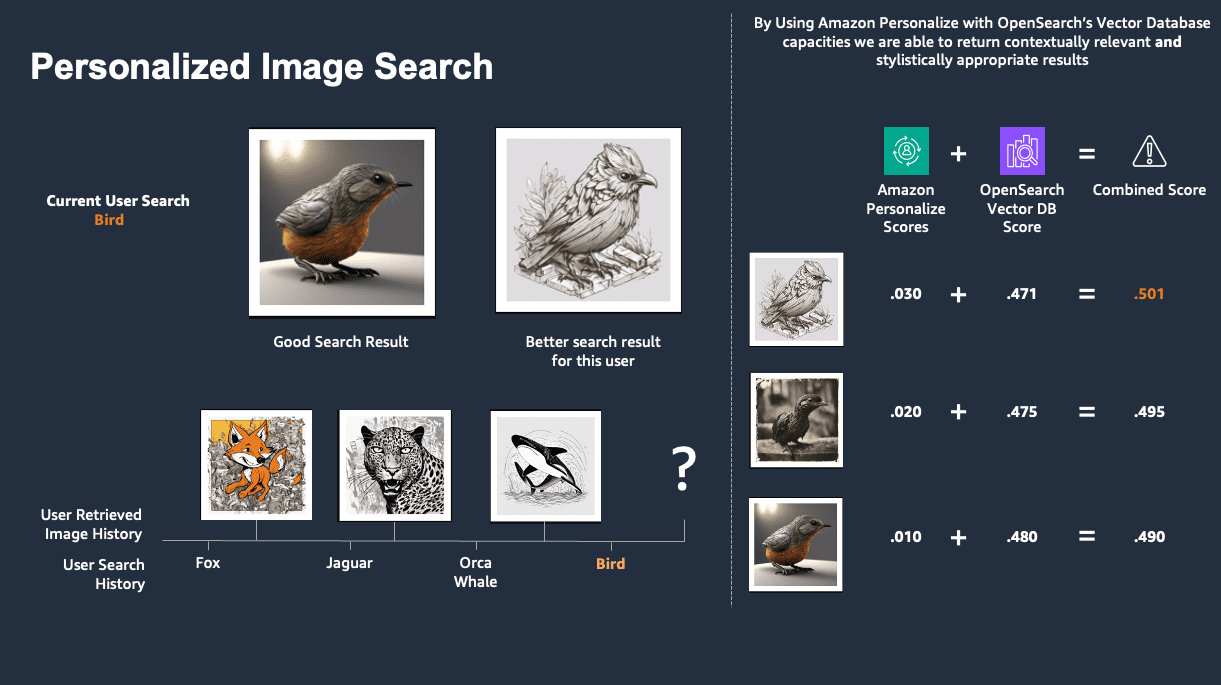
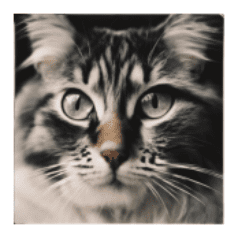
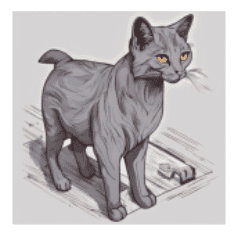
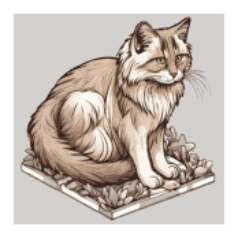
To see what this looks like in practice, let’s explore a few examples. In our example dataset, all users would, in absence of any personalization, receive the following images if they search for “cat”.
 |
 |
 |
 |
 |
 |
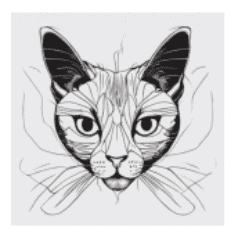
However, a user who has a history of viewing the following images (let’s call them comic-art-user) clearly has a certain style preference that isn’t addressed by the majority of the previous images.
 |
 |
 |
 |
 |
 |
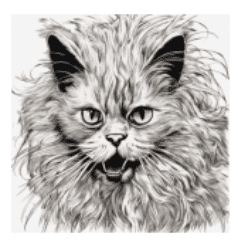
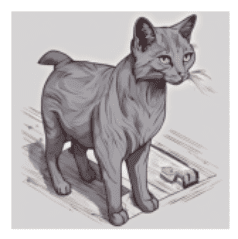
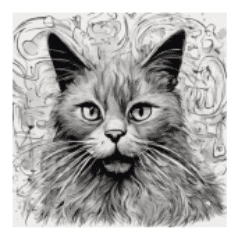
By combining Amazon Personalize with the vector database capabilities of OpenSearch Service, we are able to return the following results for cats to our user:
 |
 |
 |
 |
 |
 |
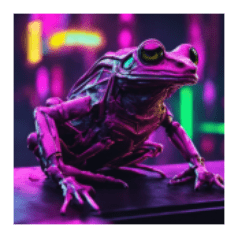
In the following example, a user has been viewing or downloading the following images (let’s call them neon-punk-user).
 |
 |
 |
They would receive the following personalized results instead of the mostly photorealistic cats that all users would receive absent any personalization.
 |
 |
 |
Finally, a user viewed or downloaded the following images (let’s call them origami-clay-user).
 |
 |
 |
They would receive the following images as their personalized search results.
 |
 |
 |
These examples illustrate how the search results have been influenced by the users’ previous interactions with other images. By combining the power of Amazon Titan Multimodal Embeddings, OpenSearch Service vector indexing, and Amazon Personalize personalization, we are able to deliver each user relevant search results in alignment with their style preferences as opposed to showing all of them the same generic search result.
Furthermore, because Amazon Personalize is capable of updating based on changes in the user style preference in real time, these search results would update as the user’s style preferences change, for example if they were a designer working for an ad agency who switched mid-browsing session to working on a different project for a different brand.
Clean up
To avoid incurring future charges, delete the resources created while building this solution:
- Delete the OpenSearch Service domain or OpenSearch Serverless collection.
- Delete the SageMaker resources.
- Delete the Amazon Personalize resources.
Conclusion
By combining the power of Amazon Titan Multimodal Embeddings, OpenSearch Service vector indexing and search capabilities, and Amazon Personalize ML recommendations, you can boost the user experience with more relevant items in their search results by learning from their previous interactions and preferences.
For more details on Amazon Titan Multimodal Embeddings, refer to Amazon Titan Multimodal Embeddings G1 model. For more details on OpenSearch Service, refer to Getting started with Amazon OpenSearch Service. For more details on Amazon Personalize, refer to the Amazon Personalize Developer Guide.
About the Authors
 Maysara Hamdan is a Partner Solutions Architect based in Atlanta, Georgia. Maysara has over 15 years of experience in building and architecting Software Applications and IoT Connected Products in Telecom and Automotive Industries. In AWS, Maysara helps partners in building their cloud practices and growing their businesses. Maysara is passionate about new technologies and is always looking for ways to help partners innovate and grow.
 Eric Bolme is a Specialist Solution Architect with AWS based on the East Coast of the United States. He has 8 years of experience building out a variety of deep learning and other AI use cases and focuses on Personalization and Recommendation use cases with AWS.

Leave a Reply