
Provide a personalized experience for news readers using Amazon Personalize and Amazon Titan Text Embeddings on Amazon Bedrock
News publishers want to provide a personalized and informative experience to their readers, but the short shelf life of news articles can make this quite difficult. In news publishing, articles typically have peak readership within the same day of publication. Additionally, news publishers frequently publish new articles and want to show these articles to interested readers as quickly as possible. This poses challenges for interaction-based recommender system methodologies such as collaborative filtering and the deep learning-based approaches used in Amazon Personalize, a managed service that can learn user preferences from their past behavior and quickly adjust recommendations to account for changing user behavior in near real time.
News publishers typically don’t have the budget or the staff to experiment with in-house algorithms, and need a fully managed solution. In this post, we demonstrate how to provide high-quality recommendations for articles with short shelf lives by using text embeddings in Amazon Bedrock. Amazon Bedrock a fully managed service that offers a choice of high-performing foundation models (FMs) from leading artificial intelligence (AI) companies like AI21 Labs, Anthropic, Cohere, Meta, Mistral AI, Stability AI, and Amazon through a single API, along with a broad set of capabilities to build generative AI applications with security, privacy, and responsible AI.
Embeddings are a mathematical representation of a piece of information such as a text or an image. Specifically, they are a vector or ordered list of numbers. This representation helps capture the meaning of the image or text in such a way that you can use it to determine how similar images or text are to each other by taking their distance from each other in the embedding space. For our post, we use the Amazon Titan Text Embeddings model.
Solution overview
By combining the benefits of Amazon Titan Text Embeddings on Amazon Bedrock with the real-time nature of Amazon Personalize, we can recommend articles to interested users in an intelligent way within seconds of the article being published. Although Amazon Personalize can provide articles shortly after they’re published, it generally takes a few hours (and a filter to select items from the correct time frame) to surface items to the right users. For our use case, we want to recommend articles immediately after they’re published.
The following diagram shows the architecture of the solution and the high-level steps of the workflow. The architecture follows AWS best practices to use managed and serverless services where possible.
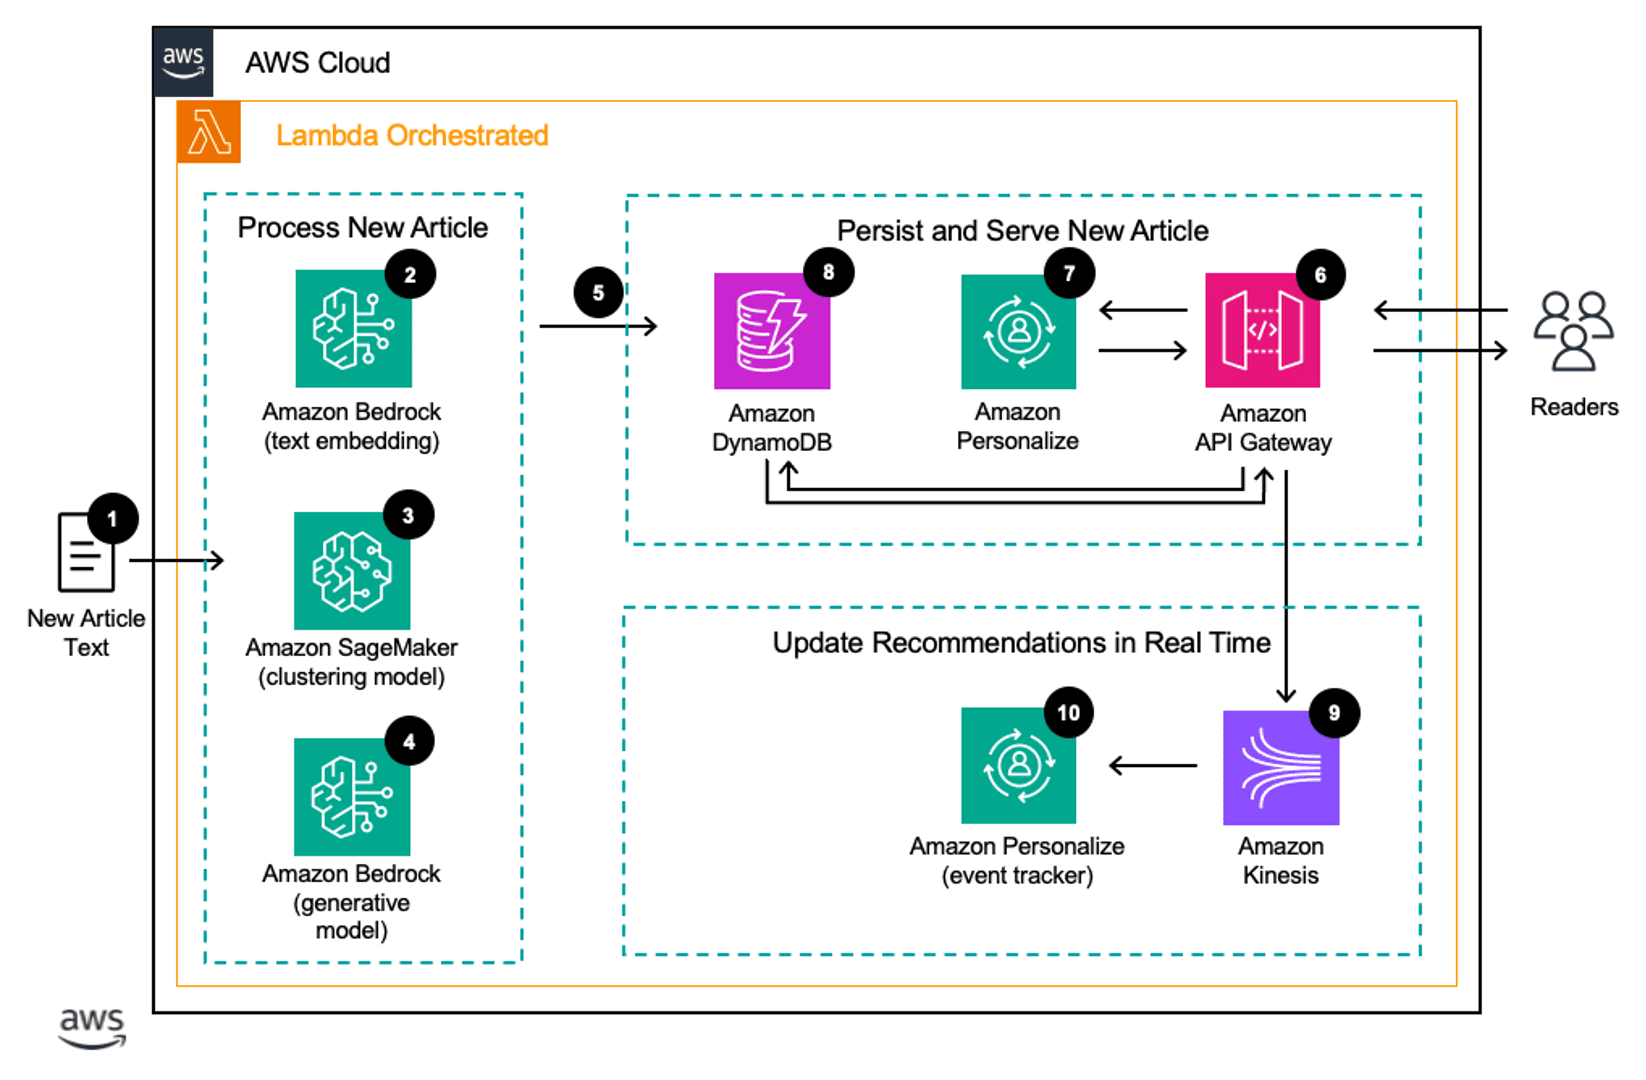
The workflow consists of the following steps:
- A trigger invokes an AWS Lambda function every time a new article is published, which runs Steps 2–5.
- A text embedding model hosted on Amazon Bedrock creates an embedding of the text of the article.
- An Amazon SageMaker hosted model assigns the article to a cluster of similar articles.
- An Amazon Bedrock hosted model can also generate headlines and summaries of the new article if needed.
- The new articles are added to Amazon DynamoDB with information on their type and when they were published, with a Time-To-Live (TTL) representing when the articles are no longer considered breaking news.
- When users arrive at the website, their requests are processed by Amazon API Gateway.
- API Gateway makes a request to Amazon Personalize to learn what individual articles and article types a reader is most interested in, which can be directly shown to the reader.
- To recommend breaking news articles, a call is made to DynamoDB to determine what articles have been recently published of each type. This allows newly published articles to be shown to interested readers in seconds.
- As users read articles, their interactions are streamed using Amazon Kinesis Data Streams to an Amazon Personalize event tracker.
- The Amazon Personalize event tracker updates the deployed personalization models within 1–2 seconds.
Prerequisites
To implement the proposed solution, you should have the following:
- An AWS account and familiarity with Amazon Personalize, SageMaker, DynamoDB, and Amazon Bedrock.
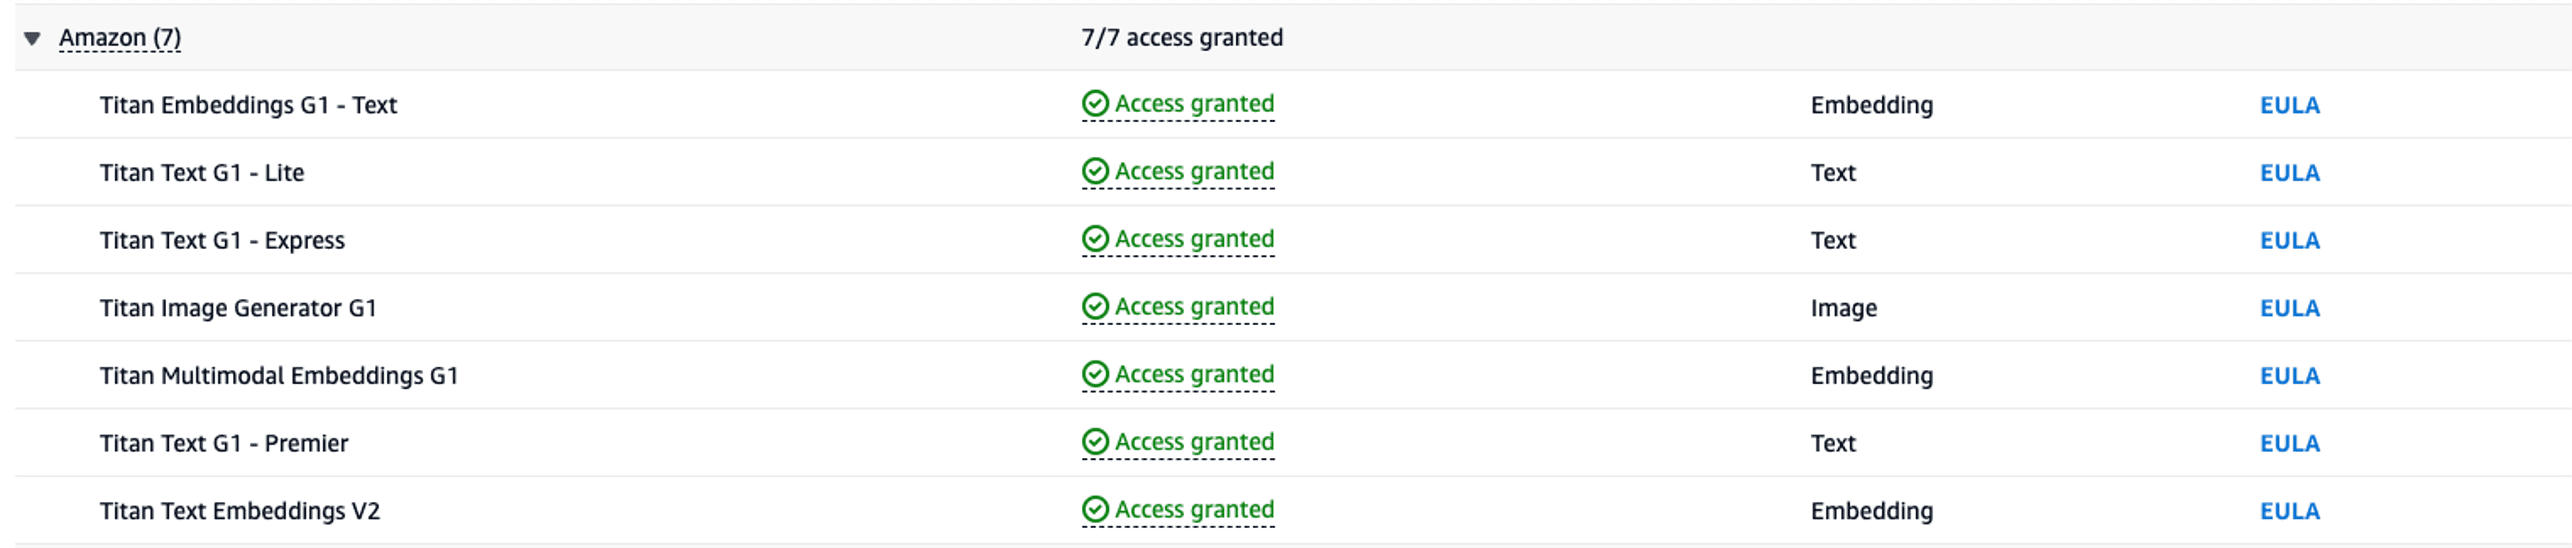
- The Amazon Titan Text Embeddings V2 model enabled on Amazon Bedrock. You can confirm it’s enabled on the Model access page of the Amazon Bedrock console. If Amazon Titan Text Embeddings is enabled, the access status will show as Access granted, as shown in the following screenshot. You can enable access to the model by choosing Manage model access, selecting Amazon Titan Text Embeddings V2, and then choosing Save Changes.
- A SageMaker domain. You can onboard a SageMaker domain by using the Set up for single user (Quick setup) option from the SageMaker console.
- Either an Amazon OpenSearch Service domain or an Amazon OpenSearch Serverless collection.
Create embeddings of the text of previously published articles
First, you need to load a set of historically published articles so you have a history of user interactions with those articles and then create embeddings for them using Amazon Titan Text Embeddings. AWS also has machine learning (ML) services that can perform tasks such as translation, summarization, and the identification of an article’s tags, title, or genre, if required. The following code snippet shows how to generate embeddings using Amazon Titan Text Embeddings:
def titan_embeddings(text, bedrock_client):
    prompt = f"{text}"
    body = json.dumps({
        "inputText": prompt,
    })

    model_id = 'amazon.titan-embed-text-v2:0'
    accept = 'application/json'
    content_type = 'application/json'

    response = bedrock_client.invoke_model(
        body=body,
        modelId=model_id,
        accept=accept,
        contentType=content_type
    )

    response_body = json.loads(response['body'].read())
    return response_body.get('embedding')
Train and deploy a clustering model
Next, you deploy a clustering model for the historical articles. A clustering model identifies clusters of article embeddings and assigns each cluster an ID. In this case, we use a k-means model hosted on SageMaker, but you can use a different clustering approach if you prefer.
The following code snippet is an example of how to create a list of the text embeddings using the Python function above and then train a k-means cluster for article embeddings. In this case, the choice of 100 clusters is arbitrary. You should experiment to find a number that is best for your use case. The instance type represents the Amazon Elastic Compute Cloud (Amazon EC2) compute instance that runs the SageMaker k-means training job. For detailed information on which instance types fit your use case and their performance capabilities, see Amazon EC2 Instance types. For information about pricing for these instance types, see Amazon EC2 Pricing. For information about available SageMaker notebook instance types, see CreateNotebookInstance. For most experimentation, you should use an ml.t3.medium instance. This is the default instance type for CPU-based SageMaker images, and is available as part of the AWS Free Tier.
text_embeddings_list = []
for text in text_list:
    text_embeddings_list.append(titan_embeddings(text, bedrock_client))

num_clusters = 100

kmeans = KMeans(
    role=role,
    instance_count=1,
    instance_type="ml.t3.medium",
    output_path="s3://your_unique_s3bucket_name/",
    k=num_clusters,
    num_trials=num_clusters,
    epochs=10
)

kmeans.fit(kmeans.record_set(np.asarray(text_embeddings_list, dtype=np.float32)))
After you finish training and deploying the clustering model, you can assign a cluster ID to each of the historical articles by passing their embeddings through the k-means (or other) clustering model. Also, importantly, you assign clusters to any articles you consider breaking news (article shelf life can vary from a couple of days to a couple of hours depending on the publication).
Set up a DynamoDB table
The next step of the process is to set up a DynamoDB table to contain the breaking news articles, their identifiers, and their clusters. This DynamoDB table will help you later when you try to query the mapping of the article item ID with the cluster ID.
The breaking news table has the following attributes:
- Article cluster ID – An initial cluster ID
- Article ID – The ID of the article (numeric for this example)
- Article timestamp – The time when the article was created
- Article genre – The genre of article, such as tech, design best practices, and so on
- Article language – A two-letter language code of the article
- Article text – The actual article text
The article cluster ID is the partition key and the article timestamp (in Unix Epoch Time) is the sort key for the breaking news table.
Update the article interactions dataset with article clusters
When you’re creating your Amazon Personalize user personalization campaign, the item interactions dataset represents the user interactions history with your items. For our use case, we train our recommender on the article clusters instead of the individual articles. This will give the model the opportunity to recommend based on the cluster-level interactions and understand user preferences to article types as opposed to individual articles. That way, when a new article is published, we simply have to identify what type of article it is, and we can immediately recommend it to interested users.
To do so, you need to update the interactions dataset, replacing the individual article ID with the cluster ID of the article and store the item interactions dataset in an Amazon Simple Storage Service (Amazon S3) bucket, at which point it can be brought into Amazon Personalize.
Create an Amazon Personalize user personalization campaign
The USER_PERSONALIZATION recipe generates a list of recommendations for a specific user subject to the constraints of filters added to it. This is useful for populating home pages of websites and subsections where specific article types, products, or other pieces of content are focused on. Refer to the following Amazon Personalize user personalization sample on GitHub for step-by-step instructions to create a user personalization model.
The steps in an Amazon Personalize workflow are as follows:
- Create a dataset group.
- Prepare and import data.
- Create recommenders or custom resources.
- Get recommendations.
To create and deploy a user personalization campaign, you first need to create a user personalization solution. A solution is a combination of a dataset group and a recipe, which is basically a set of instructions for Amazon Personalize for how to prepare a model to solve a specific type of business use case. After this, you train a solution version, then deploy it as a campaign.
This following code snippet shows how to create a user personalization solution resource:
create_solution_response = personalize.create_solution (
    name = "personalized-articles-solution”,
    datasetGroupArn = dataset_group_arn,
    recipeArn = "arn:aws:personalize:::recipe/aws-user-personalization-v2",
)
solution_arn = create_solution_response['solutionArn']
The following code snippet shows how to create a user personalization solution version resource:
create_solution_version_response = personalize.create_solution_version(
   solutionArn = solution_arn
)
solution_version_arn = create_solution_version_response['solutionVersionArn']
The following code snippet shows how to create a user personalization campaign resource:
create_campaign_response = personalize.create_campaign (
   name = "personalized-articles-campaign”,
   solutionVersionArn = solution_version_arn,
)
campaign_arn = create_campaign_response['campaignArn']
Deliver a curated and hyper-personalized breaking news experience
Articles for the breaking news section of the front page can be drawn from the Amazon Personalize campaign you trained on the article clusters in the previous section. This model identifies the types of articles aligned with each user’s preferences and interests.
The articles of this type can then be obtained by querying DynamoDB for all articles of that type, then selecting the most recent ones of each relevant type. This solution also allows the editorial team a degree of curation over the diversity of articles shown to individual users. This makes sure users can see the breadth of content available on the site and see a diverse array of perspectives while still having a hyper-personalized experience.
This is accomplished by setting a maximum number of articles that can be shown per type (a value that can be determined experimentally or by the editorial team). The most recently published articles, up to the maximum, can be selected from each cluster until the desired number of articles is obtained.
The following Python function obtains the most recently published articles (as measured by their timestamp) in the article cluster. In production, the individual articles should have a TTL representing the shelf life of the articles. The following code assumes the article IDs are numeric and increase over time. If you want to use string values for your article IDs and the article’s timestamp as the sort key for this table, you’ll need to adjust the code.
The following arguments are passed to the function:
- cluster (str or int) – A string or integer representing the cluster in question for which we want to obtain the list of interested users
- dynamo_client – A Boto3 DynamoDB client
- table_name (str) – The table name of the DynamoDB table in which we store the information
- index_name (str) – The name of the index
- max_per_cluster (int) – The maximum number of items to pull per cluster
def query_dynamo_db_articles(
	cluster,
	index_name,
	dynamo_client,
	table_name,
	max_per_cluster):

	arguments = {
		"TableName": table_name,
		"IndexName" : index_name,
		"ScanIndexForward": False,
		"KeyConditionExpression": "articleClusterId = :V1",
		"ExpressionAttributeValues": {
		":V1": {"S": str(cluster)}
	},
        "Limit": max_per_cluster
}

return dynamo_client.query(**arguments)
Using the preceding function, the following function selects the relevant articles in each cluster recommended by the Amazon Personalize user personalization model that we created earlier and continues iterating through each cluster until it obtains the maximum desired number of articles. Its arguments are as follows:
- personalize_runtime – A Boto3 client representing Amazon Personalize Runtime
- personalize_campaign – The campaign ARN generated when you deployed the user personalization campaign
- user_id (str) – The user ID of the reader
- dynamo_client – A Boto3 DynamoDB client
- table_name (str) – The table name of the DynamoDB table storing the information
- index_name (str) – The name of the index
- max_per_cluster (str) – The maximum number of articles to pull per cluster
- desired_items (int) – The total number of articles to return
def breaking_news_cluster_recommendation(personalize_runtime,
	personalize_campaign,
	user_id,
	dynamo_client,
	table_name,
	index_name,
	max_per_cluster,
	desired_items):


	recommendation = personalize_runtime.get_recommendations(
		campaignArn=personalize_campaign,
		userId=user_id
	) # Returns recommended clusterId list

	item_count = 0
	item_list = []

	for cluster_number in recommendation['itemList']:
		cluster = cluster_number['itemId']
		dynamo_query_response = query_dynamo_db_articles(
			cluster,
			index_name,
			dynamo_client,
			table_name,
			max_per_cluster
		)

		for item in dynamo_query_response['Items']:
			item_list.append(item)
			item_count += 1
			if item_count == desired_items:
				break
			if item_count == desired_items:
				break

	return item_list
Keep recommendations up to date for users
When users interact with an article, the interactions are sent to an event tracker. However, unlike a typical Amazon Personalize deployment, in this case we send an interaction as if it occurred with the cluster the article is a member of. There are several ways to do this; one is to embed the article’s cluster in its metadata along with the article ID so they can be fed back to the event tracker. Another is to look up the article’s cluster using its ID in some form of lightweight cache (or key-value database).
Whichever way you choose, after you obtain the article’s cluster, you stream in an interaction with it using the event tracker.
The following code snippet sets up the event tracker:
create_event_tracker_response = personalize.create_event_tracker(
    name = event_tracker_name,
    datasetGroupArn=dataset_group_arn
)
The following code snippet feeds in new interactions to the event tracker:
event_tracker_id = create_event_tracker_response['trackingId']

response = personalize_events.put_events(
    trackingId=event_tracker_id,
    userId=sample_user,
    sessionId=session_id, # a unique id for this users session
    eventList=[]# contains a list of up to 10 item-interactions
)
These new interactions will cause Amazon Personalize to update its recommendations in real time. Let’s see what this looks like in practice.
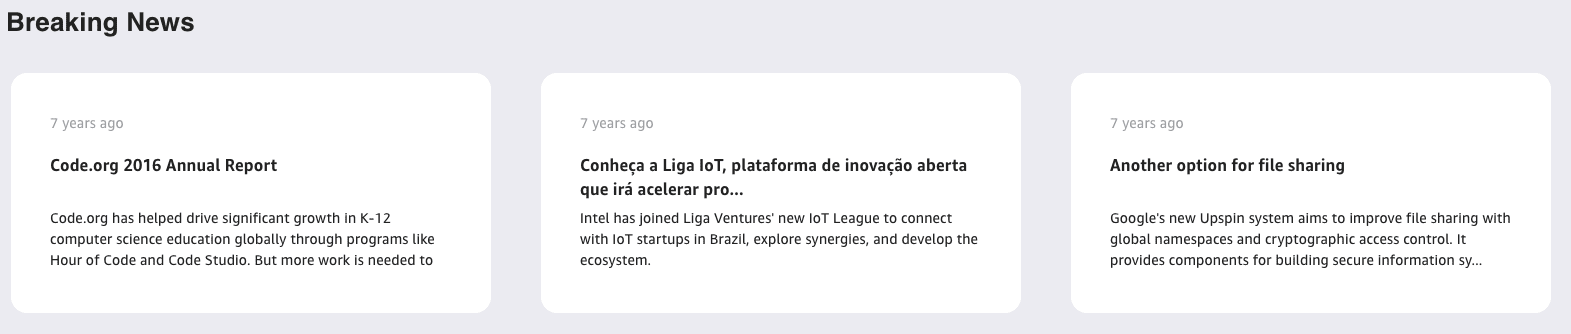
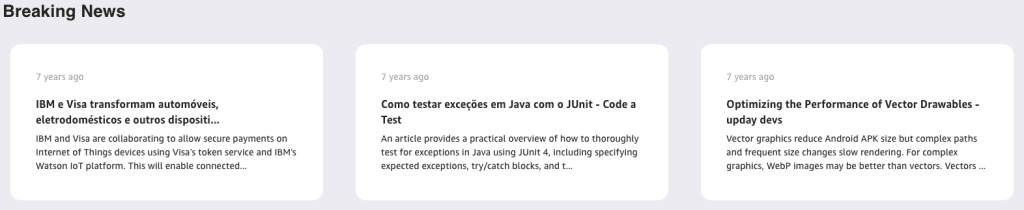
With a sample dataset derived from the CI&T DeskDrop dataset, a user logging in to their homepage would see these articles. (The dataset is a mixture of Portuguese and English articles; the raw text has been translated but the titles have not. The solution described in this post works for multilingual audiences without requiring separate deployments.) All the articles shown are considered breaking news, meaning we haven’t tracked interactions with them in our dataset and they are being recommended using the clustering techniques described earlier.
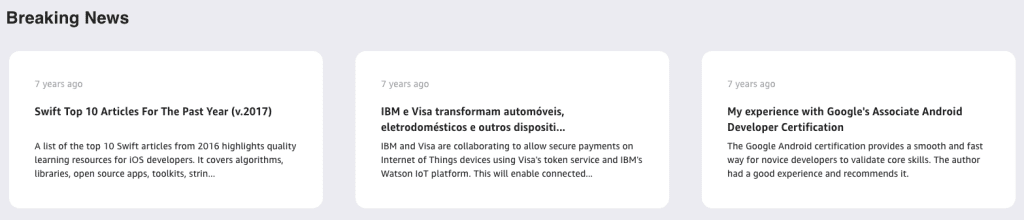
However, we can interact with the more technical articles, as shown in the following screenshot.

When we refresh our recommendations, the page is updated.

Let’s change our behavior and interact with articles more about design best practices and career development.

We get the following recommendations.
If we limit the number of articles that we can draw per cluster, we can also enforce a bit more diversity in our recommendations.
As new articles are added as part of the news publishing process, the articles are saved to an S3 bucket first. A Lambda trigger on the bucket invokes a series of steps:
- Generate an embedding of the text of the article using the model on Amazon Bedrock.
- Determine the cluster ID of the article using the k-means clustering model on SageMaker that you trained earlier.
- Store the relevant information on the article in a DynamoDB table.
Clean up
To avoid incurring future charges, delete the resources you created while building this solution:
- Delete the SageMaker resources.
- Delete the Amazon Personalize resources.
- Delete the Amazon DynamoDB tables.
Conclusion
In this post, we described how you can recommend breaking news to a user using AWS AI/ML services. By taking advantage of the power of Amazon Personalize and Amazon Titan Text Embeddings on Amazon Bedrock, you can show articles to interested users within seconds of them being published.
As always, AWS welcomes your feedback. Leave your thoughts and questions in the comments section. To learn more about the services discussed in this blog, you can sign up for an AWS Skill Builder account, where you can find free digital courses on Amazon Personalize, Amazon Bedrock, Amazon SageMaker and other AWS services.
About the Authors
 Eric Bolme is a Specialist Solution Architect with AWS based on the East Coast of the United States. He has 8 years of experience building out a variety of deep learning and other AI use cases and focuses on Personalization and Recommendation use cases with AWS.
 Joydeep Dutta is a Principal Solutions Architect at AWS. Joydeep enjoys working with AWS customers to migrate their workloads to the cloud, optimize for cost, and help with architectural best practices. He is passionate about enterprise architecture to help reduce cost and complexity in the enterprise. He lives in New Jersey and enjoys listening to music and enjoying the outdoors in his spare time.
Leave a Reply