Connect to your Amazon CloudWatch data to detect anomalies and diagnose their root cause using Amazon Lookout for Metrics
Amazon Lookout for Metrics uses machine learning (ML) to automatically detect and diagnose anomalies (outliers from the norm) without requiring any prior ML experience. Amazon CloudWatch provides you with actionable insights to monitor your applications, respond to system-wide performance changes, optimize resource utilization, and get a unified view of operational health.
This post demonstrates how you can seamlessly connect to your data in CloudWatch to set up a highly accurate anomaly detector across metrics, dimensions, and namespaces of your choice using Lookout for Metrics. The solution allows you to set up a continuous anomaly detector and optionally set up alerts to receive notifications when anomalies occur.
Solution overview
The following diagram shows the architecture of our continuous detection system.
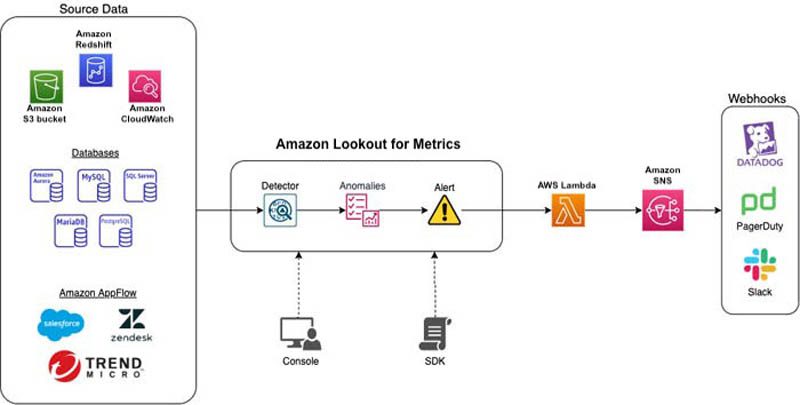
To implement our solution, we complete the following high-level steps:
- Create an anomaly detector with Lookout for Metrics.
- Add a dataset to the detector and define the CloudWatch metrics.
- Activate the detector.
- Create an alert.
- Review detector status.
- Review and analyze any found anomalies.
The dataset used for this post is an Amazon API Gateway based service with various supported APIs that emit metrics like Latency, 4XXError, 5XXError, and Request count available through CloudWatch.
Create an anomaly detector with Lookout for Metrics
To create your anomaly detector, complete the following steps:
- On the Lookout for Metrics console, choose Create detector.
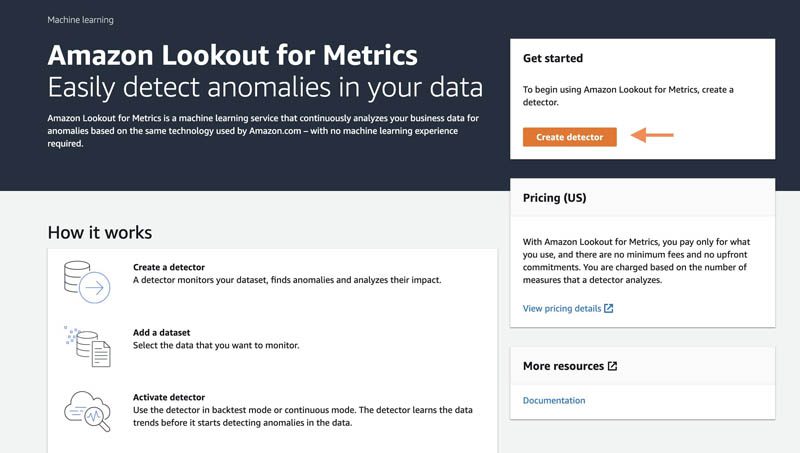
- For Detector name, enter a name.
- For Description, enter an optional description.
- For Interval, choose the time between each analysis.
- In the Encryption section, you can choose to let Lookout for Metrics encrypt your data using an AWS Key Management Service (AWS KMS) key, but this isn’t mandatory.
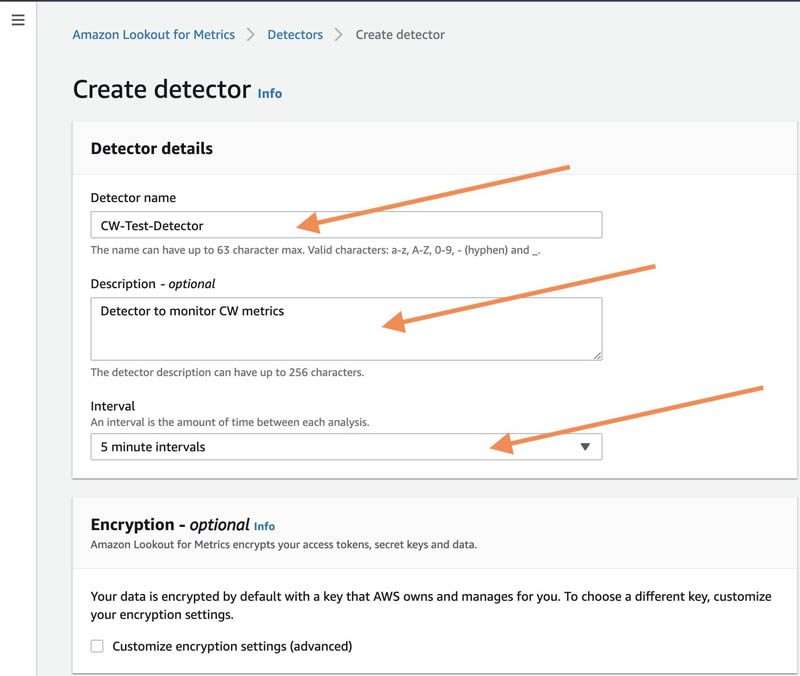
- The Tags section is also optional.
- Choose Create.

Add a dataset to the detector and define the CloudWatch metrics
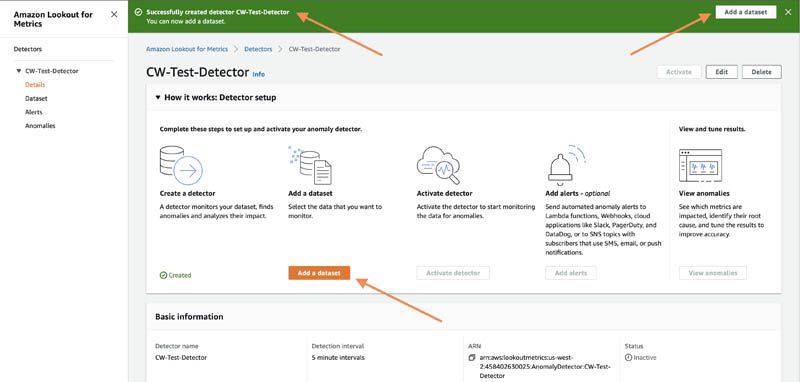
After you create the anomaly detector, a banner appears that confirms its creation. You can then add a dataset to your newly created detector.
- Choose Add a dataset, either on the banner or on the detector details page.
- For Name, enter a name for the dataset.
- Optionally, enter a description and choose a time zone.
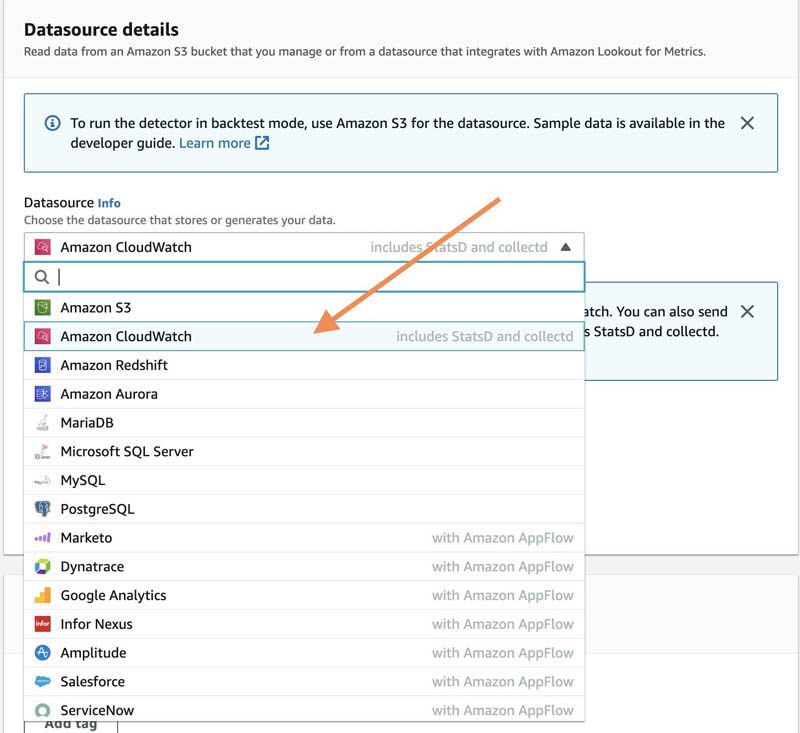
- For Datasource, choose the data source that stores your data.
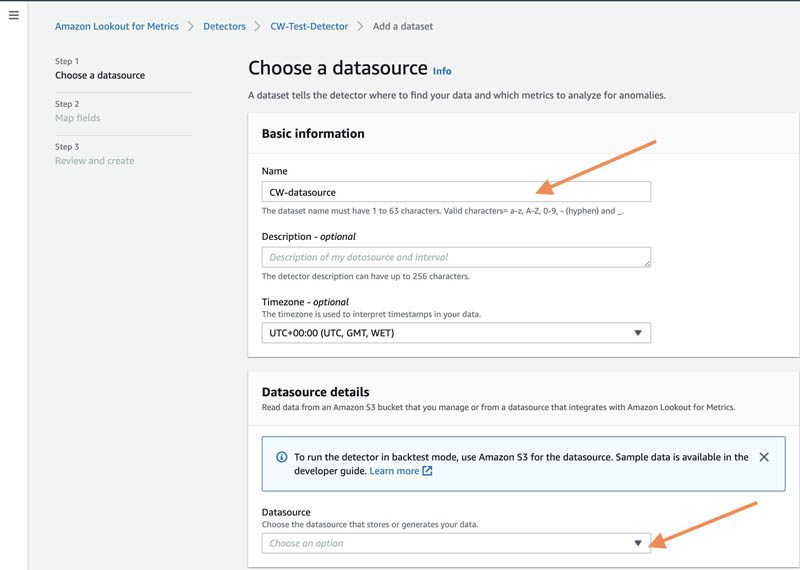
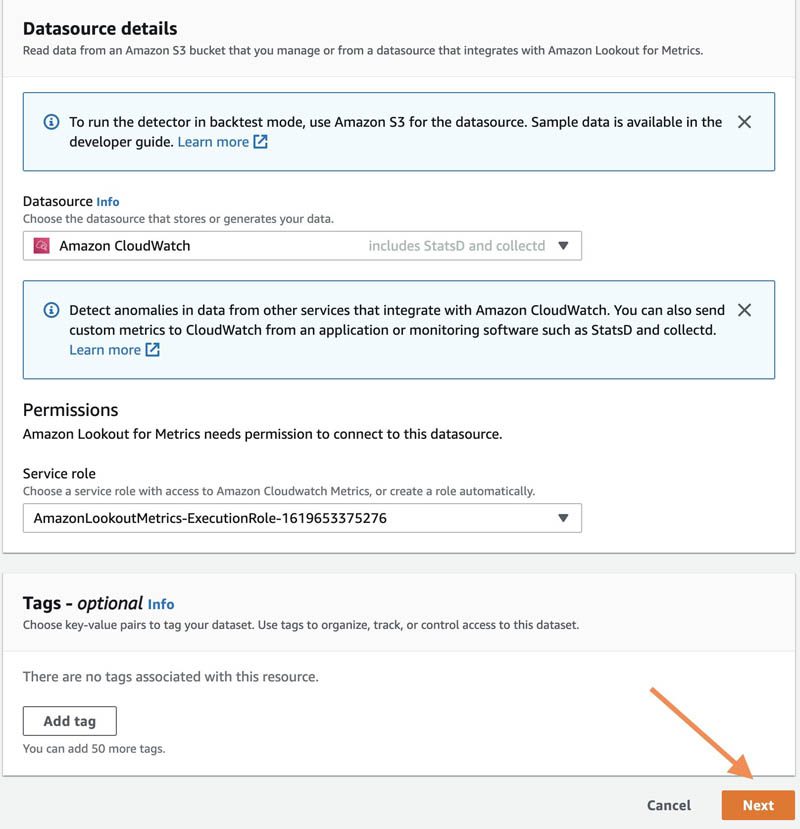
Lookout for Metrics supports multiple data sources. For this post, we use CloudWatch.
- Choose Next.
We now define the relevant CloudWatch metrics.
- For Namespace, choose the CloudWatch namespace to use with the dataset (for this post, we choose ApiGateway).
Lookout for Metrics automatically populates this list with all the available namespaces for your account.
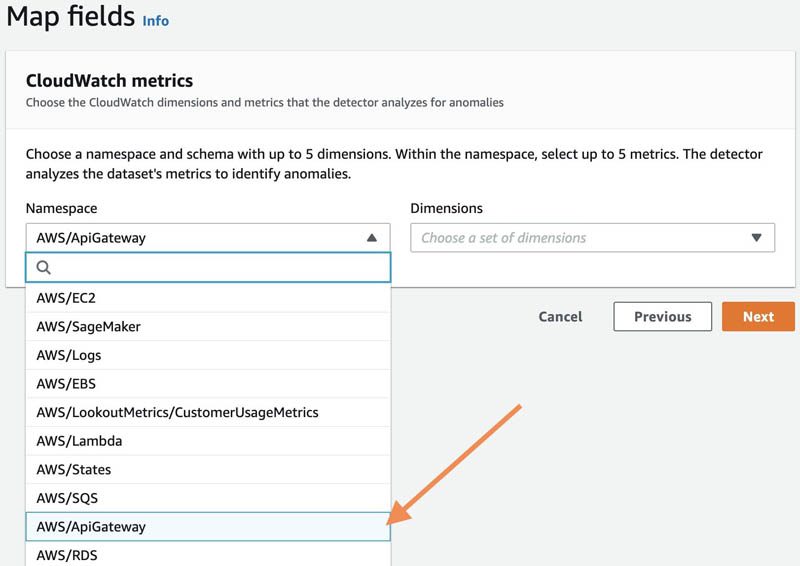
- For Dimensions, choose up to five dimensions within your CloudWatch namespace.
Lookout for Metrics makes this easy for you by pre-populating the available dimensions for a given namespace.
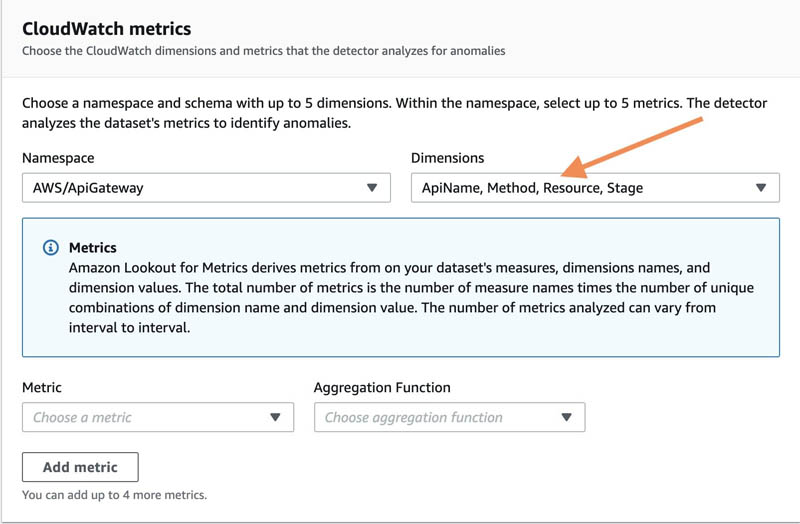
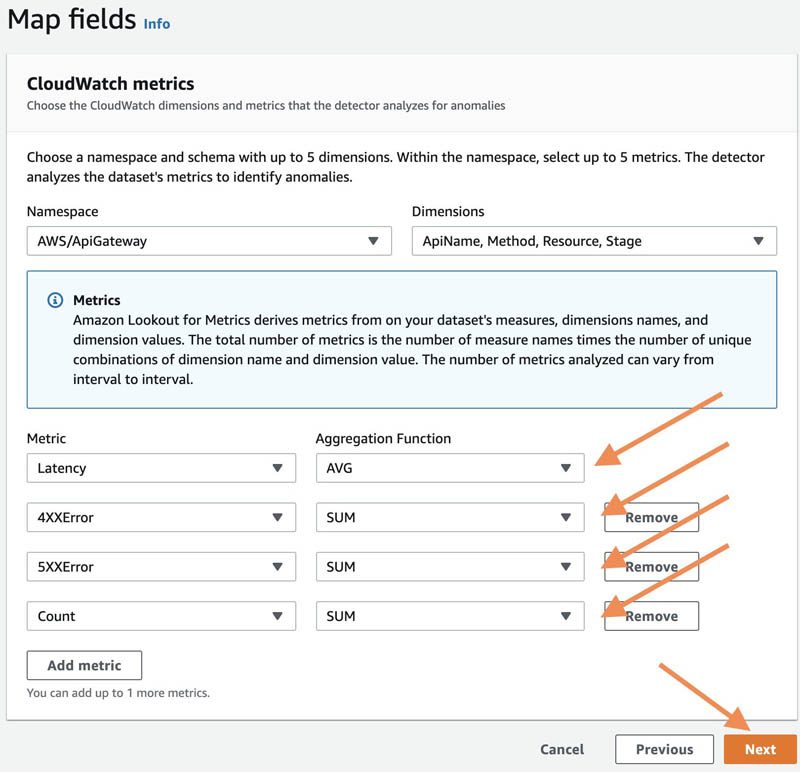
- For Metric, choose the metrics to monitor (up to five).
These metrics should also be associated with the same namespace.
- Choose Next.
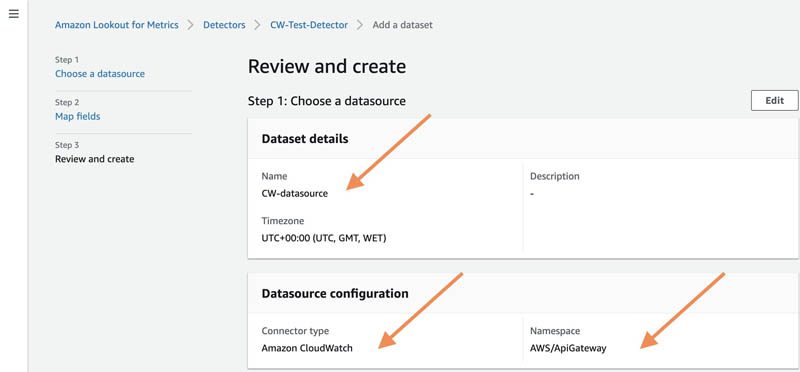
- Review the details.
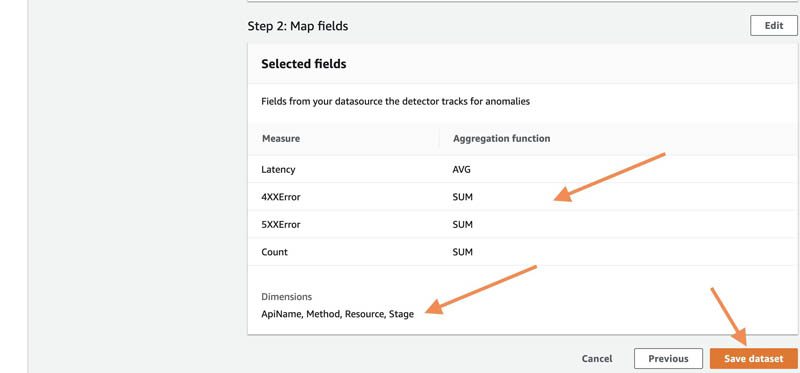
- Choose Save dataset to save the dataset settings.
Activate the detector
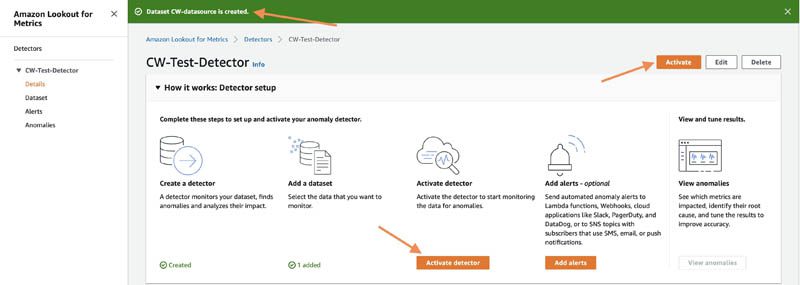
Now that the dataset is created, we activate the detector.
- On the details page for the detector, choose Activate or Activate detector.
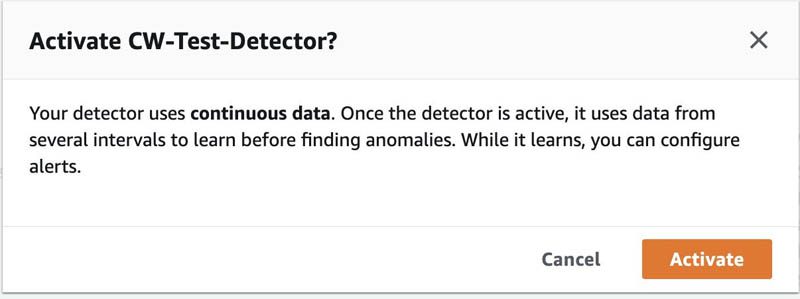
- Choose Activate to confirm that you want to activate the detector for continuous detection.
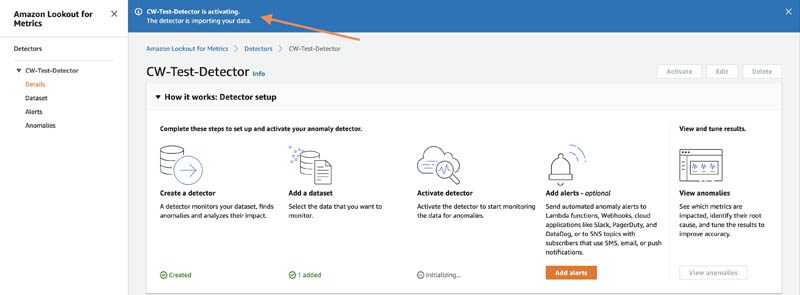
A message appears to confirm that the detector is activating.
Create an alert
At any time before or after you activate the detector, you can create an alert.
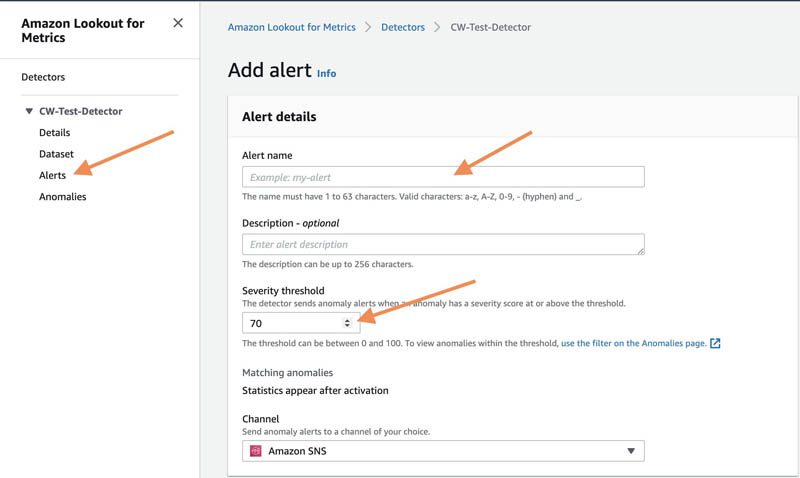
- In the navigation pane, choose Alerts.
- For Alert name¸ enter a name.
- For Severity threshold, choose your preferred sensitivity of the alert configuration.
- For Channel, you can choose between Amazon Simple Notification Service (Amazon SNS) or AWS Lambda as the notification method.
For this post, we use Amazon SNS.
- Choose Add alert.
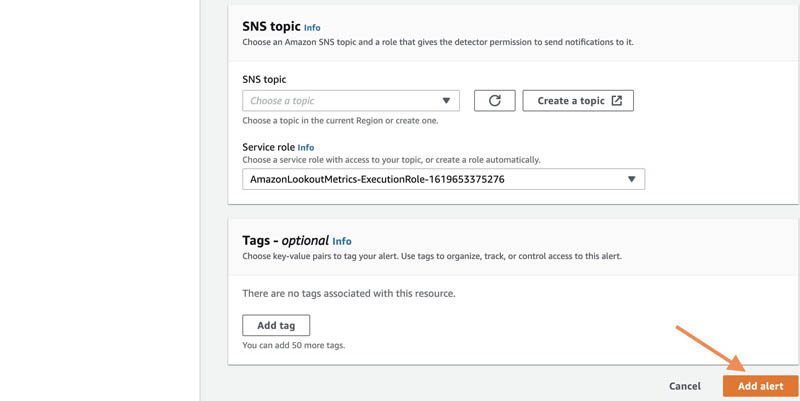
Review detector status
When the anomaly detector is active, you can use the Detector log tab on the detector details page to review the detector runs that have been performed by Lookout for Metrics.
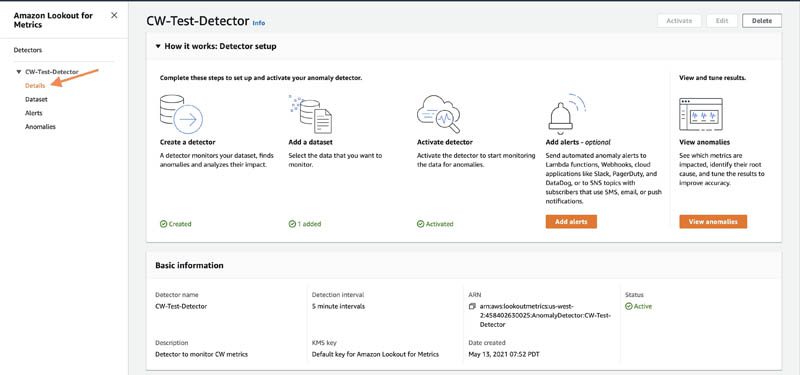

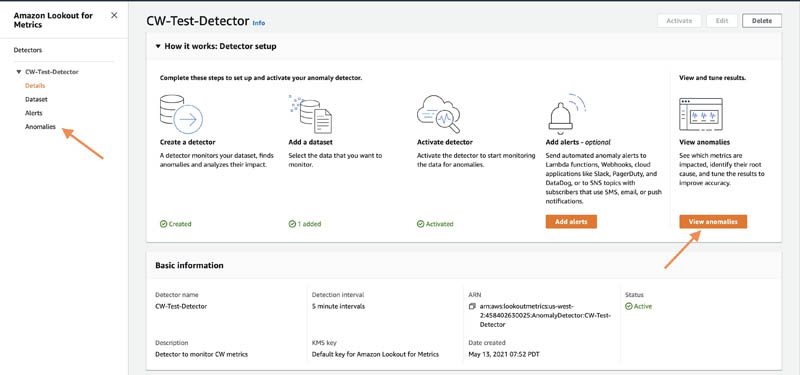
You can also choose View anomalies on the detector details page to manually inspect anomalies that may have been detected.
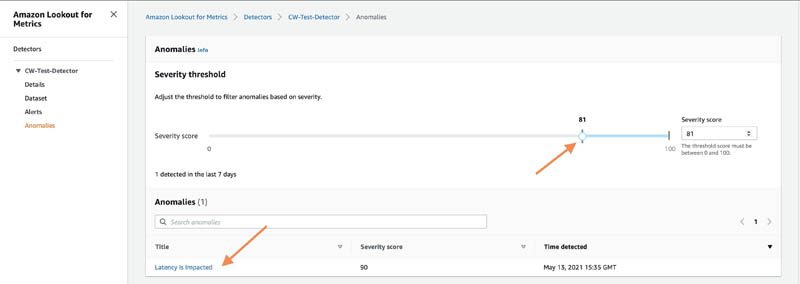
On the Anomalies page, you can adjust the severity score threshold on the threshold dial to filter anomalies above a given score.
Review and analyze anomalies
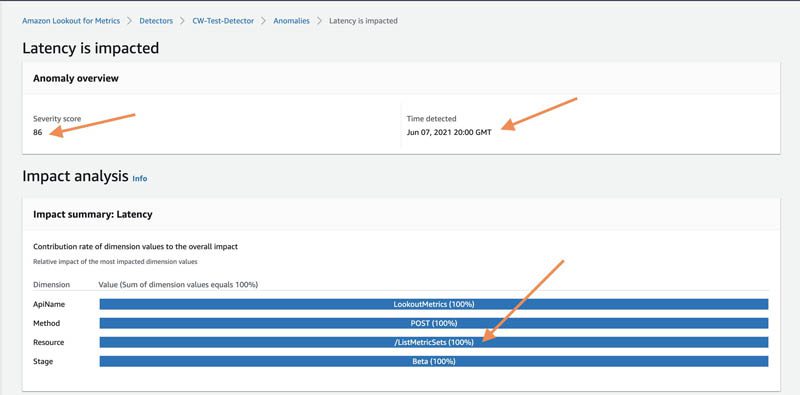
When detecting an anomaly, Lookout for Metrics helps you focus on what matters most by assigning a severity score to aid prioritization. To help you find the root cause, it intelligently groups anomalies that may be related to the same incident and summarizes the different sources of impact.
In the following screenshot, the anomaly in latency on June 7 at 20:00 GMT had a severity score of 86, indicating a high-severity anomaly that needs immediate attention. The impact analysis also tells you that the primary API impacted was ListMetricSets.
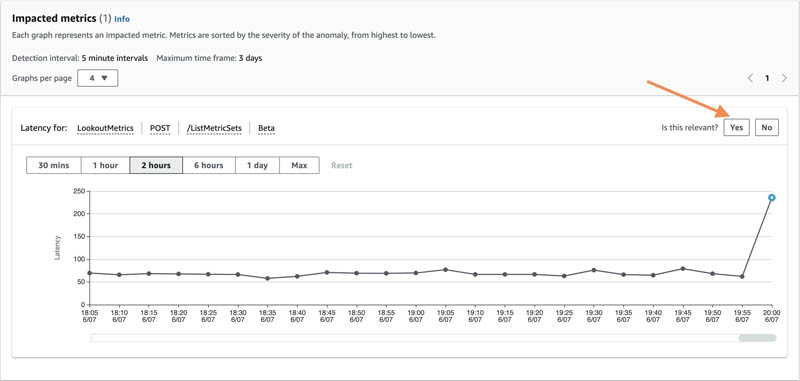
Lookout for Metrics also allows you to provide real-time feedback on the relevance of the detected anomalies, which enables a powerful human-in-the-loop mechanism. This information is fed back to the anomaly detection model to improve its accuracy continuously, in near-real time.
Conclusion
You can seamlessly connect to your data in CloudWatch to set up a highly accurate anomaly detector across metrics, dimensions, and namespaces of your choice using Lookout for Metrics.
To get started with this capability, see Using Amazon CloudWatch with Lookout for Metrics. You can use this capability in all Regions where Lookout for Metrics is publicly available. For more information about Region availability, see AWS Regional Services.
About the Authors
 Ankita Verma is the Product Lead for Amazon Lookout for Metrics. Her current focus is helping businesses make data-driven decisions using AI and ML. Outside of AWS, she is a fitness enthusiast, and loves mentoring budding product managers and entrepreneurs in her free time. She also publishes a weekly product management newsletter called The Product Mentors on Substack.
 Raj Vippagunta is a Senior SDE at AWS AI Services. He uses his vast experience in large-scale distributed systems and his passion for machine learning to build practical service offerings in the AI space. He has helped build various solutions for AWS and Amazon. In his spare time, he likes reading books and watching travel and cuisine vlogs from across the world.
Tags: Archive

Leave a Reply