Parallel data processing with RStudio on Amazon SageMaker
Last year, we announced the general availability of RStudio on Amazon SageMaker, the industry’s first fully managed RStudio Workbench integrated development environment (IDE) in the cloud. You can quickly launch the familiar RStudio IDE, and dial up and down the underlying compute resources without interrupting your work, making it easy to build machine learning (ML) and analytics solutions in R at scale.
With ever-increasing data volume being generated, datasets used for ML and statistical analysis are growing in tandem. With this brings the challenges of increased development time and compute infrastructure management. To solve these challenges, data scientists have looked to implement parallel data processing techniques. Parallel data processing, or data parallelization, takes large existing datasets and distributes them across multiple processers or nodes to operate on the data simultaneously. This can allow for faster processing time of larger datasets, along with optimized usage on compute. This can help ML practitioners create reusable patterns for dataset generation, and also help reduce compute infrastructure load and cost.
Solution overview
Within Amazon SageMaker, many customers use SageMaker Processing to help implement parallel data processing. With SageMaker Processing, you can use a simplified, managed experience on SageMaker to run your data processing workloads, such as feature engineering, data validation, model evaluation, and model interpretation. This brings many benefits because there’s no long-running infrastructure to manage—processing instances spin down when jobs are complete, environments can be standardized via containers, data within Amazon Simple Storage Service (Amazon S3) is natively distributed across instances, and infrastructure settings are flexible in terms of memory, compute, and storage.
SageMaker Processing offers options for how to distribute data. For parallel data processing, you must use the ShardedByS3Key option for the S3DataDistributionType. When this parameter is selected, SageMaker Processing takes the provided n instances and distribute objects 1/n objects from the input data source across the instances. For example, if two instances are provided with four data objects, each instance receives two objects.
SageMaker Processing requires three components to run processing jobs:
- A container image that has your code and dependencies to run your data processing workloads
- A path to an input data source within Amazon S3
- A path to an output data source within Amazon S3
The process is depicted in the following diagram.
In this post, we show you how to use RStudio on SageMaker to interface with a series of SageMaker Processing jobs to create a parallel data processing pipeline using the R programming language.
The solution consists of the following steps:
- Set up the RStudio project.
- Build and register the processing container image.
- Run the two-step processing pipeline:
- The first step takes multiple data files and processes them across a series of processing jobs.
- The second step concatenates the output files and splits them into train, test, and validation datasets.
Prerequisites
Complete the following prerequisites:
- Set up the RStudio on SageMaker Workbench. For more information, refer to Announcing Fully Managed RStudio on Amazon SageMaker for Data Scientists.
- Create a user with RStudio on SageMaker with appropriate access permissions.
Set up the RStudio project
To set up the RStudio project, complete the following steps:
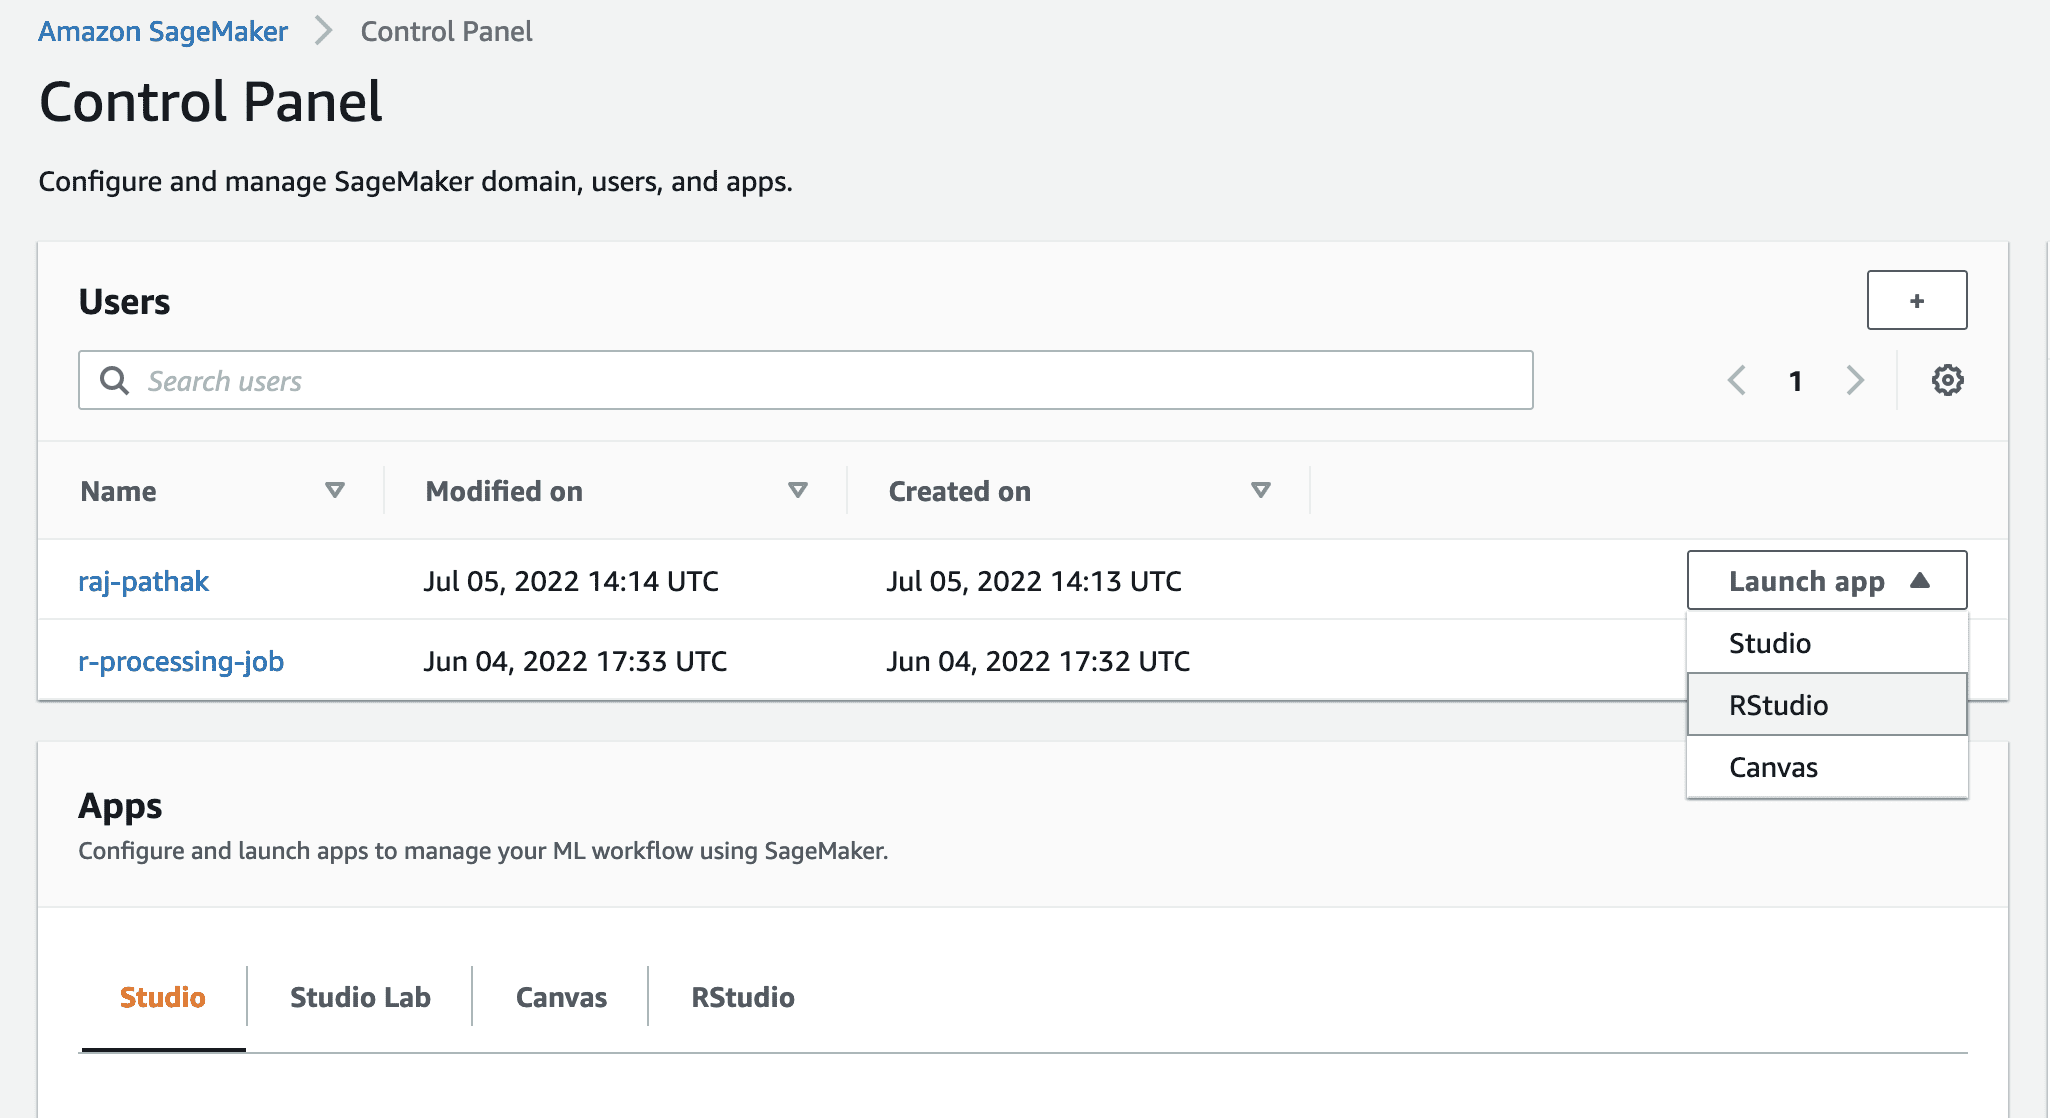
- Navigate to your Amazon SageMaker Studio control panel on the SageMaker console.
- Launch your app in the RStudio environment.

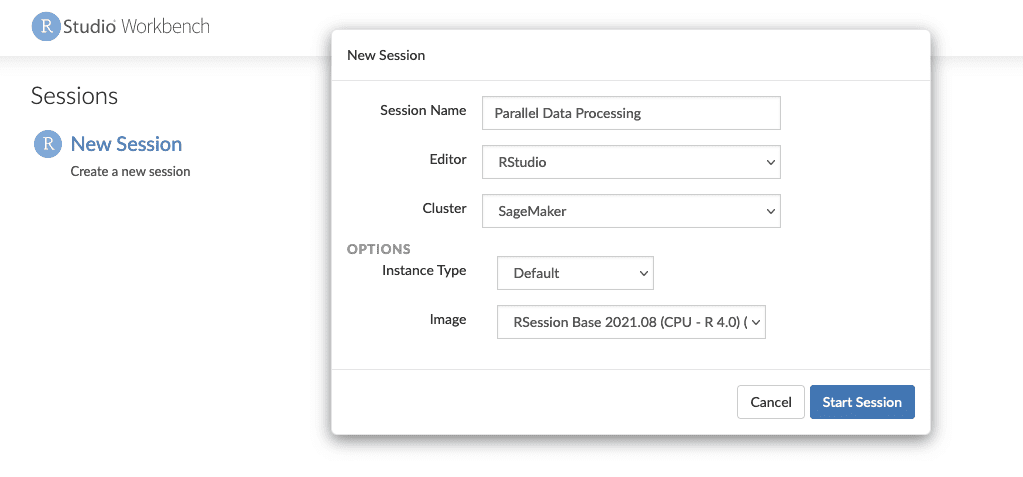
- Start a new RStudio session.
- For Session Name, enter a name.
- For Instance Type and Image, use the default settings.
- Choose Start Session.

- Navigate into the session.
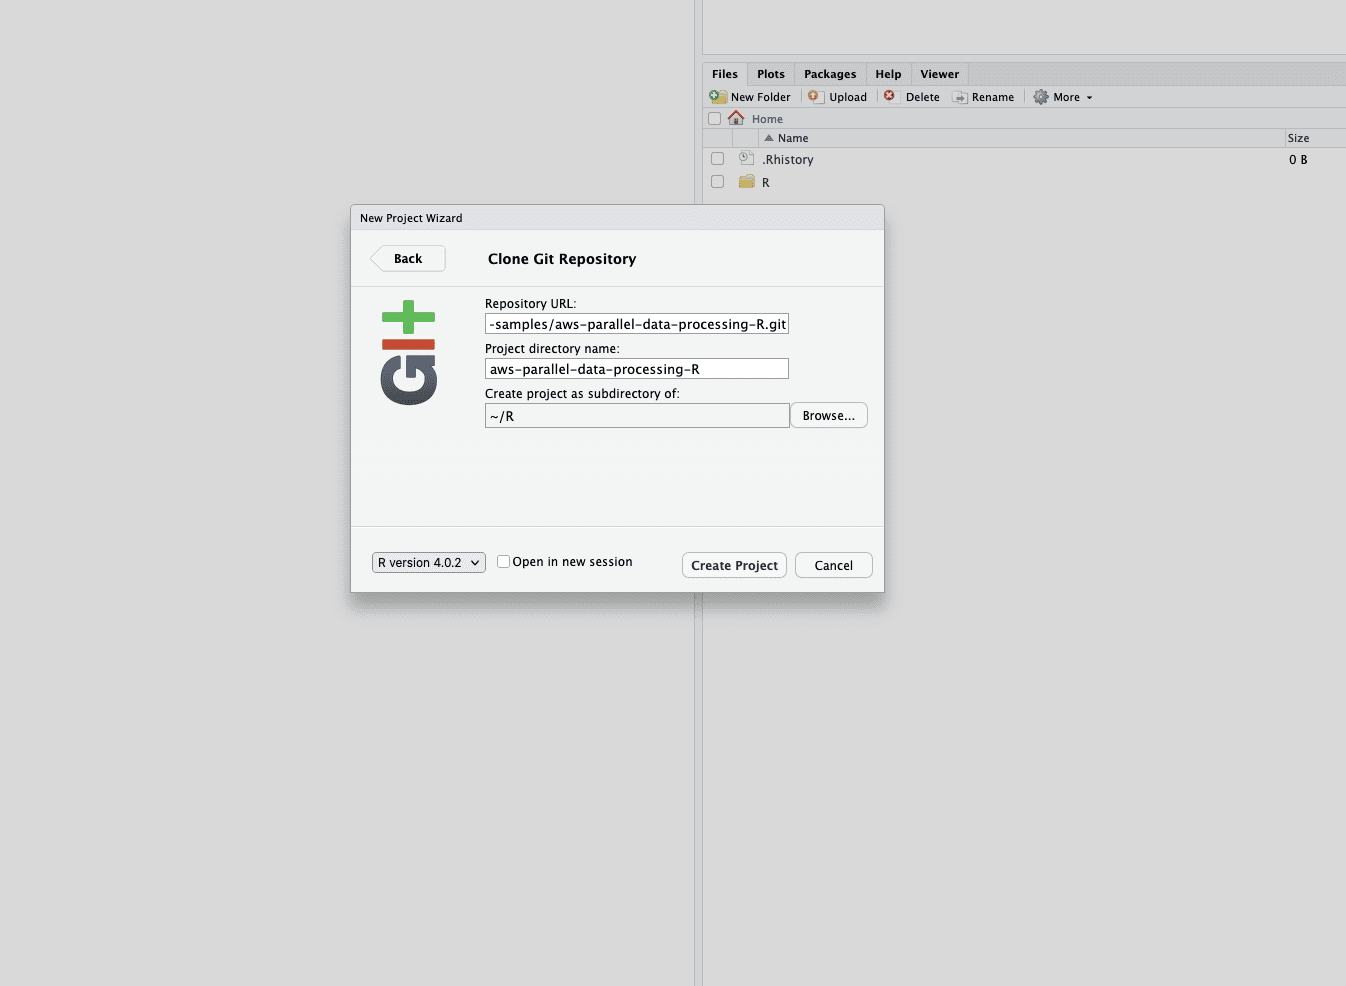
- Choose New Project, Version control, and then Select Git.
- For Repository URL, enter
https://github.com/aws-samples/aws-parallel-data-processing-r.git - Leave the remaining options as default and choose Create Project.

You can navigate to the aws-parallel-data-processing-R directory on the Files tab to view the repository. The repository contains the following files:
Container_Build.rmd/datasetbank-additional-full-data1.csvbank-additional-full-data2.csvbank-additional-full-data3.csvbank-additional-full-data4.csv
/dockerDockerfile-ProcessingParallel_Data_Processing.rmd/preprocessingfilter.Rprocess.R
Build the container
In this step, we build our processing container image and push it to Amazon Elastic Container Registry (Amazon ECR). Complete the following steps:
- Navigate to the
Container_Build.rmdfile. - Install the SageMaker Studio Image Build CLI by running the following cell. Make sure you have the required permissions prior to completing this step, this is a CLI designed to push and register container images within Studio.
- Run the next cell to build and register our processing container:
After the job has successfully run, you receive an output that looks like the following:
Run the processing pipeline
After you build the container, navigate to the Parallel_Data_Processing.rmd file. This file contains a series of steps that helps us create our parallel data processing pipeline using SageMaker Processing. The following diagram depicts the steps of the pipeline that we complete.
Start by running the package import step. Import the required RStudio packages along with the SageMaker SDK:
Now set up your SageMaker execution role and environment details:
Initialize the container that we built and registered in the earlier step:
From here we dive into each of the processing steps in more detail.
Upload the dataset
For our example, we use the Bank Marketing dataset from UCI. We have already split the dataset into multiple smaller files. Run the following code to upload the files to Amazon S3:
After the files are uploaded, move to the next step.
Perform parallel data processing
In this step, we take the data files and perform feature engineering to filter out certain columns. This job is distributed across a series of processing instances (for our example, we use two).
We use the filter.R file to process the data, and configure the job as follows:
As mentioned earlier, when running a parallel data processing job, you must adjust the input parameter with how the data will be sharded, and the type of data. Therefore, we provide the sharding method by S3Prefix:
After you insert these parameters, SageMaker Processing will equally distribute the data across the number of instances selected.
Adjust the parameters as necessary, and then run the cell to instantiate the job.
Generate training, test, and validation datasets
In this step, we take the processed data files, combine them, and split them into test, train, and validation datasets. This allows us to use the data for building our model.
We use the process.R file to process the data, and configure the job as follows:
Adjust the parameters are necessary, and then run the cell to instantiate the job.
Run the pipeline
After all the steps are instantiated, start the processing pipeline to run each step by running the following cell:
The time each of these jobs takes will vary based on the instance size and count selected.
Navigate to the SageMaker console to see all your processing jobs.
We start with the filtering job, as shown in the following screenshot.
When that’s complete, the pipeline moves to the data processing job.
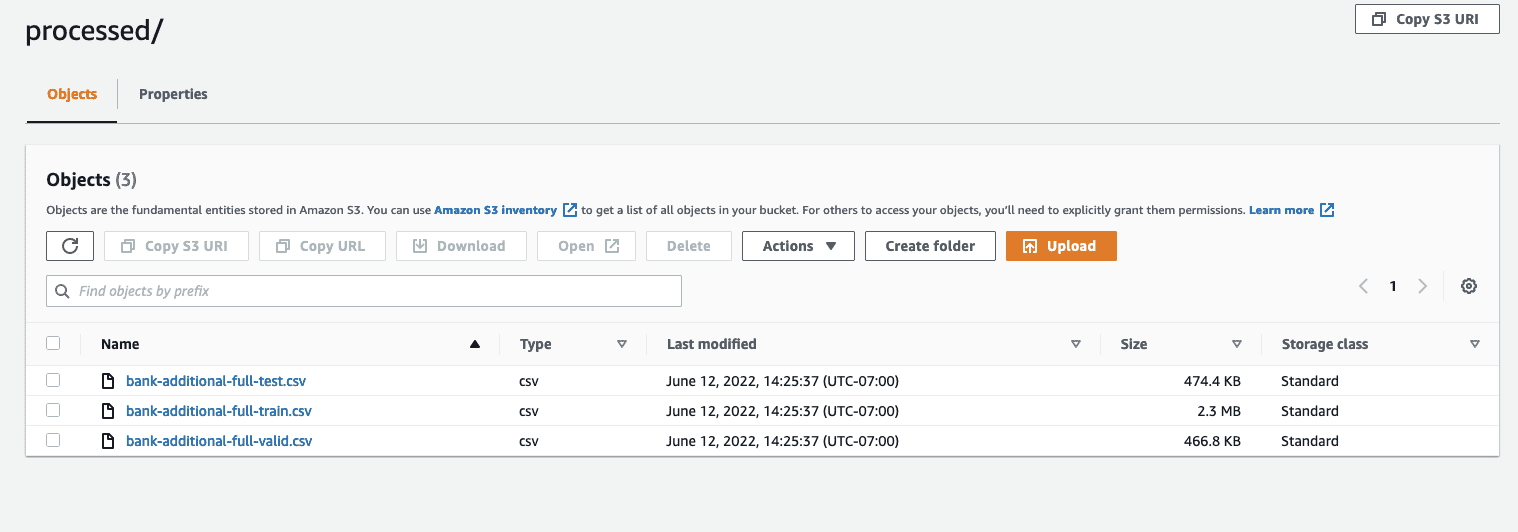
When both jobs are complete, navigate to your S3 bucket. Look within the sagemaker-rstudio-example folder, under processed. You can see the files for the train, test and validation datasets.
Conclusion
With an increased amount of data that will be required to build more and more sophisticated models, we need to change our approach to how we process data. Parallel data processing is an efficient method in accelerating dataset generation, and if coupled with modern cloud environments and tooling such as RStudio on SageMaker and SageMaker Processing, can remove much of the undifferentiated heavy lifting of infrastructure management, boilerplate code generation, and environment management. In this post, we walked through how you can implement parallel data processing within RStudio on SageMaker. We encourage you to try it out by cloning the GitHub repository, and if you have suggestions on how to make the experience better, please submit an issue or a pull request.
To learn more about the features and services used in this solution, refer to RStudio on Amazon SageMaker and Amazon SageMaker Processing.
About the authors
 Raj Pathak is a Solutions Architect and Technical advisor to Fortune 50 and Mid-Sized FSI (Banking, Insurance, Capital Markets) customers across Canada and the United States. Raj specializes in Machine Learning with applications in Document Extraction, Contact Center Transformation and Computer Vision.
 Jake Wen is a Solutions Architect at AWS with passion for ML training and Natural Language Processing. Jake helps Small Medium Business customers with design and thought leadership to build and deploy applications at scale. Outside of work, he enjoys hiking.
 Aditi Rajnish is a first-year software engineering student at University of Waterloo. Her interests include computer vision, natural language processing, and edge computing. She is also passionate about community-based STEM outreach and advocacy. In her spare time, she can be found rock climbing, playing the piano, or learning how to bake the perfect scone.
 Sean Morgan is an AI/ML Solutions Architect at AWS. He has experience in the semiconductor and academic research fields, and uses his experience to help customers reach their goals on AWS. In his free time, Sean is an active open-source contributor and maintainer, and is the special interest group lead for TensorFlow Add-ons.
 Paul Wu is a Solutions Architect working in AWS’ Greenfield Business in Texas. His areas of expertise include containers and migrations.
Tags: Archive


Leave a Reply